Workers are injured every year not because they’re careless—but because the lockout tagout procedure steps were skipped, misunderstood, or poorly implemented. In high-risk environments like manufacturing plants, maintenance bays, or industrial facilities, even a momentary lapse in energy isolation can lead to amputations, electrocutions, or worse. The solution isn't just having a LOTO plan—it's executing the right steps, every time, without exception.
Here’s how to implement a reliable lockout tagout procedure that protects your team and keeps your operations compliant.
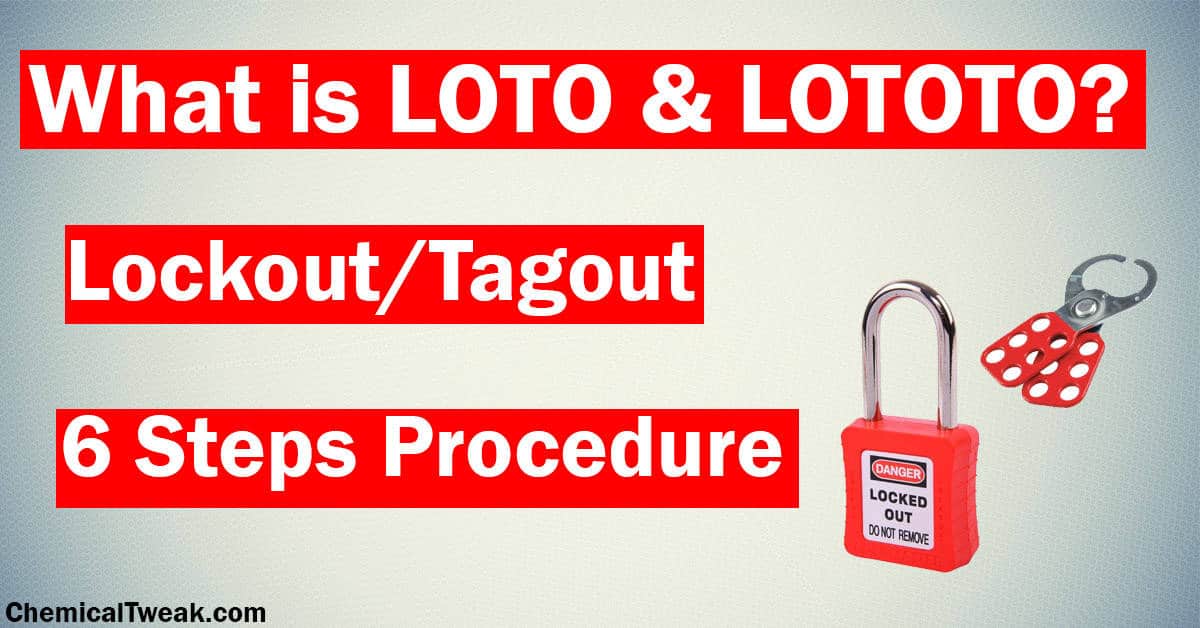
Why Lockout Tagout Procedure Steps Matter
Lockout tagout (LOTO) is more than a compliance box to check—it’s a structured defense against unexpected energization or startup of machinery during servicing. OSHA estimates that proper LOTO procedures prevent approximately 120 fatalities and 50,000 injuries annually in the U.S. alone.
But numbers don’t tell the full story. A technician once reached into a conveyor system assuming it was safe—only for a coworker, unaware of maintenance work, to restart the system remotely. The result: a life-altering injury. That incident could have been avoided with correctly followed LOTO procedure steps.
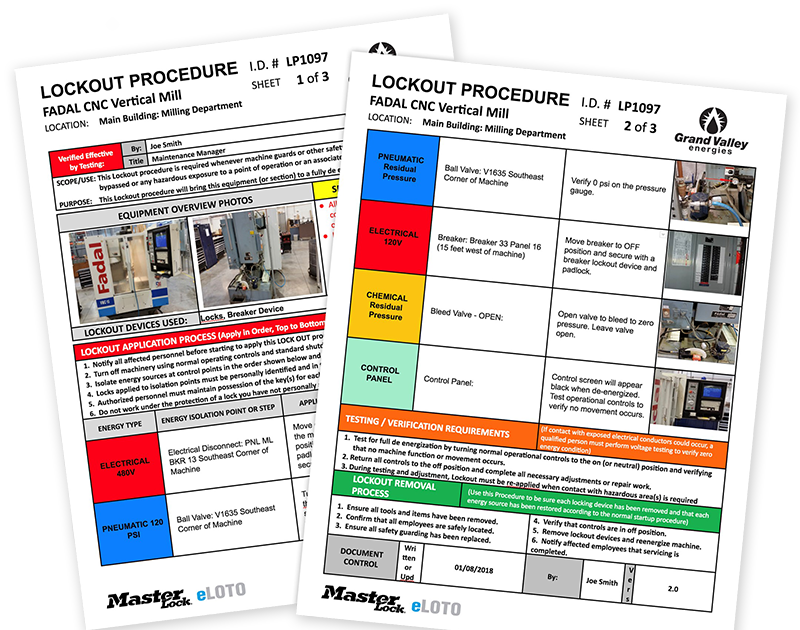
Step 1: Prepare for Shutdown Before shutting down any machine, the authorized employee must understand the type and magnitude of energy involved—electrical, mechanical, hydraulic, pneumatic, chemical, or thermal. This step is often rushed, but skipping it leads to incomplete isolation.
What this looks like in practice: A maintenance technician servicing a hydraulic press reviews the equipment’s energy control plan. They identify three energy sources: primary electrical feed, pressurized hydraulic lines, and residual spring tension. Each will need a specific lockout device and verified isolation.
Common mistake: Assuming all energy is electrical. Pneumatic systems, for example, can store lethal pressure even after power is cut.
Workflow tip: Use a LOTO checklist tailored to each machine. Generic forms fail when unique energy sources are overlooked.
Step 2: Notify Affected Personnel
Communication is part of safety. Before initiating shutdown, warn all affected employees—those who operate or use the machine—that service is about to begin.
This isn’t just courtesy. It prevents someone from unknowingly triggering a restart or interfering with the work area.
Example: In a packaging facility, a line mechanic announces over the intercom that the labeling machine will be down for 30 minutes for motor replacement. Operators shift to backup lines, and no one approaches the isolated zone.
Limitation: In shift-based operations, verbal handoffs can fail. Use logbooks or digital notifications to maintain continuity.
Step 3: Shut Down the Equipment Properly
Use normal stopping procedures—buttons, switches, or control panels—to power down the machine. Never rely on emergency stops as the primary shutdown method, as they may not fully de-energize all components.
Best practice: Follow manufacturer-recommended shutdown sequences. Some CNC machines, for instance, require specific software commands to fully de-energize servo drives.
Real-world gap: In fast-paced environments, workers might bypass shutdown steps to save time. Supervisors must enforce standard operating procedures.
Step 4: Isolate All Energy Sources
This is where physical control begins. Disconnect each energy source using readily accessible isolation points: circuit breakers, disconnect switches, block valves, bleeder valves, or manual disconnects.

Critical insight: One lock is not enough if multiple energy sources exist. A single machine may require: - An electrical lockout on the main disconnect - A hydraulic valve lockout - A pneumatic bleed-and-block mechanism
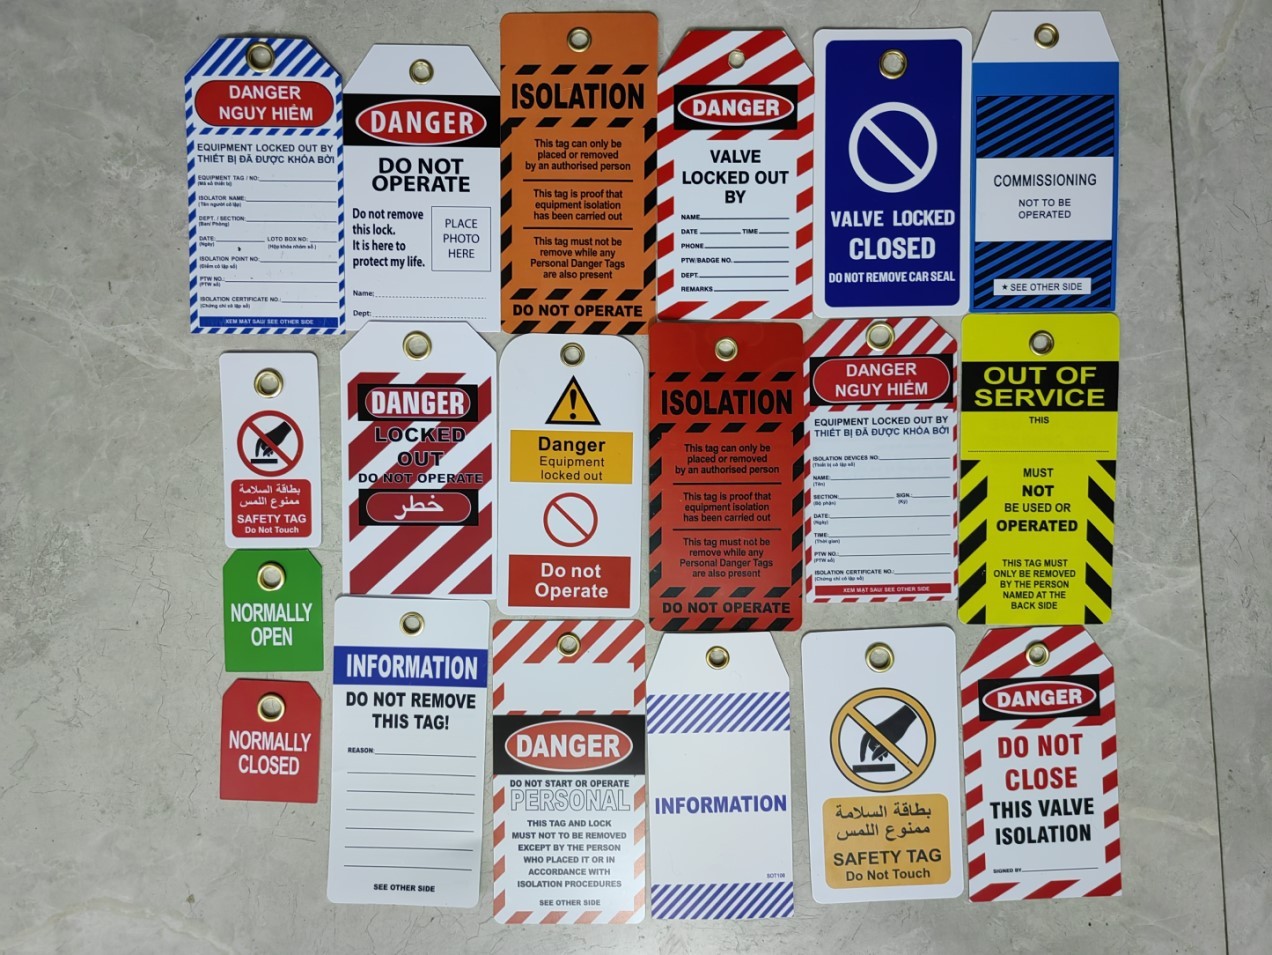
Use only OSHA-compliant lockout devices—padlocks, hasps, valve locks, plug locks—that are durable and uniquely keyed to the individual.
Checklist for isolation: - [ ] Electrical main disconnect locked out - [ ] Hydraulic lines depressurized and blocked - [ ] Pneumatic system bled and valved off - [ ] Gravity hazards secured (e.g., suspended loads) - [ ] Chemical lines blinded or capped
Step 5: Apply Lockout/Tagout Devices
Each authorized employee working on the equipment applies their own lock and tag. This is non-transferable—no shared locks, no master keys unless under strict controls.
Tag content must include: - Name of the person who applied the lock - Date and time - Reason for lockout - Contact information
Tags are warnings; locks are physical barriers. Tags alone (tagout-only) are permitted only if the lock cannot be applied—but this increases risk and requires additional safety measures.
Common error: Using a single lock for multiple workers. If three technicians are servicing a boiler, three individual locks must be used in a group lockout box or hasp.
Step 6: Release Stored or Residual Energy
Just because the power is off doesn’t mean the machine is safe. Stored energy in springs, capacitors, elevated parts, or pressurized lines can be deadly.
Examples of residual energy release: - Bleeding air from pneumatic lines using manual valves - Draining hydraulic fluid into safe reservoirs - Lowering suspended components and blocking them - Discharging capacitors with grounding rods
Pro tip: Use a multimeter to verify zero energy in electrical systems. Never assume a line is dead.
Danger zone: Capacitors in industrial drives can hold lethal charge for hours after power-off. Always ground and test.
Step 7: Verify Isolation (The Most Crucial Step)
This is the make-or-break moment. Before any work begins, the authorized employee must verify that the equipment cannot start and that zero energy is present.
- Verification method:
- Attempt to start the machine using its normal controls (e.g., press start button).
- Observe that no movement or response occurs.
- Re-check with voltage testers, pressure gauges, or mechanical indicators.
After verification, return controls to “Off” or “Neutral.”
Why this fails: Some skip verification because “the lock is in place.” That’s complacency. A faulty disconnect switch might appear off but still conduct electricity.
Real case: At a paper mill, a technician verified isolation only on the main motor—missing a secondary drive still energized. The machine partially activated, causing severe hand injury.
Step 8: Perform Maintenance or Servicing
Only after all previous steps are completed should work begin. All personnel must remain aware that the lockout is active and should never bypass, remove, or tamper with a lock or tag.
Supervisor role: Conduct periodic inspections to ensure LOTO procedures are followed during maintenance.
Worksite tip: Use secondary barricades or caution tape around the work zone to deter accidental entry.
Step 9: Remove Lockout Devices Safely
Restoring equipment to service is just as important as shutting it down.
- Steps for removal:
- Ensure tools are removed and guards reinstalled.
- Confirm all employees are clear of the machine.
- Notify affected personnel that operations are resuming.
- Each authorized employee removes their own lock and tag.
- Re-energize equipment using proper startup procedures.

Critical rule: Never remove another person’s lock—even if they’re on break. Use a formal lock removal procedure involving supervisors and verification only when absolutely necessary.
Warning: Rushing startup leads to missed steps. One automotive plant resumed production after brake repair—but a technician’s lock was still on the hydraulic system. The line jammed, causing cascading downtime.
Step 10: Restore Equipment and Resume Operations After all locks are removed, restart the machine according to manufacturer guidelines. Monitor initial operation for abnormalities.
Document the entire LOTO event in the maintenance log, including: - Time of shutdown and restart - Names of authorized employees - Nature of work performed - Any issues encountered
Audit-ready records protect your team and your compliance status.
Common LOTO Procedure Failures and How to Fix Them
Even experienced teams make mistakes. Here are recurring breakdowns—and how to prevent them:
| Failure | Risk | Solution |
|---|---|---|
| Skipping verification | Worker exposed to energized equipment | Mandate verification as a signed step |
| Using tagout without locks | No physical barrier | Use locks unless equipment design prohibits |
| Group lockout without a coordinator | Miscommunication, lost accountability | Assign a primary authorized employee |
| Inadequate training | Poor understanding of energy sources | Conduct machine-specific LOTO training |
| Improper lock storage | Delays, loss, or misuse | Use lockout stations near high-risk equipment |
Tools and Devices That Support Effective LOTO
The right equipment makes procedure adherence easier and safer. Here are five essential tools used in modern LOTO programs:
| Tool | Purpose | Best Use Case |
|---|---|---|
| Lockout Hasps | Allows multiple locks on one isolation point | Group maintenance tasks |
| Circuit Breaker Locks | Prevents resetting of breakers | Electrical panels |
| Valve Lockouts | Secures ball, gate, or butterfly valves | Pneumatic and hydraulic systems |
| Plug Lockout Devices | Covers electrical plugs | Portable tools and machinery |
| Lockout Stations | Centralized storage for locks, tags, and forms | Factory floors with multiple work zones |
Insight: Color-coded locks (e.g., red for maintenance, blue for contractors) improve visibility and accountability.
Final Thoughts: Consistency Beats Complexity
A perfect lockout tagout procedure isn’t the one with the most steps—it’s the one that’s followed reliably, every single time. Complexity kills compliance. Train your team on the 10 core steps, reinforce with checklists, and audit regularly.
Start with high-risk machines. Build muscle memory. Then scale.
Your safest day is the one where every lock is placed, every tag is read, and every worker walks away unharmed.
FAQ
What is the first step in the lockout tagout procedure? The first step is preparing for shutdown by identifying all energy sources and understanding the associated hazards.
Can tagout be used without lockout? Yes, but only when a lock cannot be applied. Tagout alone requires additional safety measures due to higher risk.
Who can remove a lockout device? Only the authorized employee who applied the lock may remove it, unless a formal removal procedure is followed.
How many types of energy must be controlled in LOTO? At least six: electrical, mechanical, hydraulic, pneumatic, chemical, and thermal. Some machines involve multiple forms.
Is LOTO required for routine maintenance? Yes, if the servicing involves removal of guards or placing any part of the body into a point of operation.
What is the purpose of the verification step? To confirm that all energy sources are isolated and the machine cannot be started, ensuring worker safety.
Do all employees need LOTO training? Authorized employees (performing maintenance) need full training. Affected employees (operating equipment) require awareness training.
FAQ
What should you look for in Lockout Tagout Procedure Steps for Workplace Safety? Focus on relevance, practical value, and how well the solution matches real user intent.
Is Lockout Tagout Procedure Steps for Workplace Safety suitable for beginners? That depends on the workflow, but a clear step-by-step approach usually makes it easier to start.
How do you compare options around Lockout Tagout Procedure Steps for Workplace Safety? Compare features, trust signals, limitations, pricing, and ease of implementation.
What mistakes should you avoid? Avoid generic choices, weak validation, and decisions based only on marketing claims.
What is the next best step? Shortlist the most relevant options, validate them quickly, and refine from real-world results.